Schedules
Back to knowledge base index
As your team are the heartbeat of your salon, scheduling is the heartbeat of Loop hr functions! Basically, for compliance (accurate reporting/recording data) everything revolves around three things:
- the employee profile having accurate information
- employee service and retail targets set correctly within Loop hr
- and the scheduled hours (holidays overtime TOIL etc.) are accurate.
When these fundamental elements are correct, Loop hr will do all the leg work for you calculating targets, commissions, payroll, holidays and more!
We’ve spent years juggling multiple salons with many employees – in our experience, fixed work schedules work best for the employee and are less stressful to manage. Importantly, fixed schedules are good for clients too, as they know when their preferred team member is in!
In short, we recommend that you:
- do not over complicate work schedules
- use Overtime Banked and TOIL (Time off in Lieu) to manage the ebbs and flows of staffing needs
- maintain schedule adjustments (record overtime, absences and late etc.) throughout the work period (rather than stressing out on the day your processing payroll)!
However, you choose to manage your scheduling, if you would like help creating a template work schedule for your business, please contact us via live chat.
Before setting up an employee work schedule, you may wish to check the pre-set ‘system attendance codes’ and/or set up your own codes:
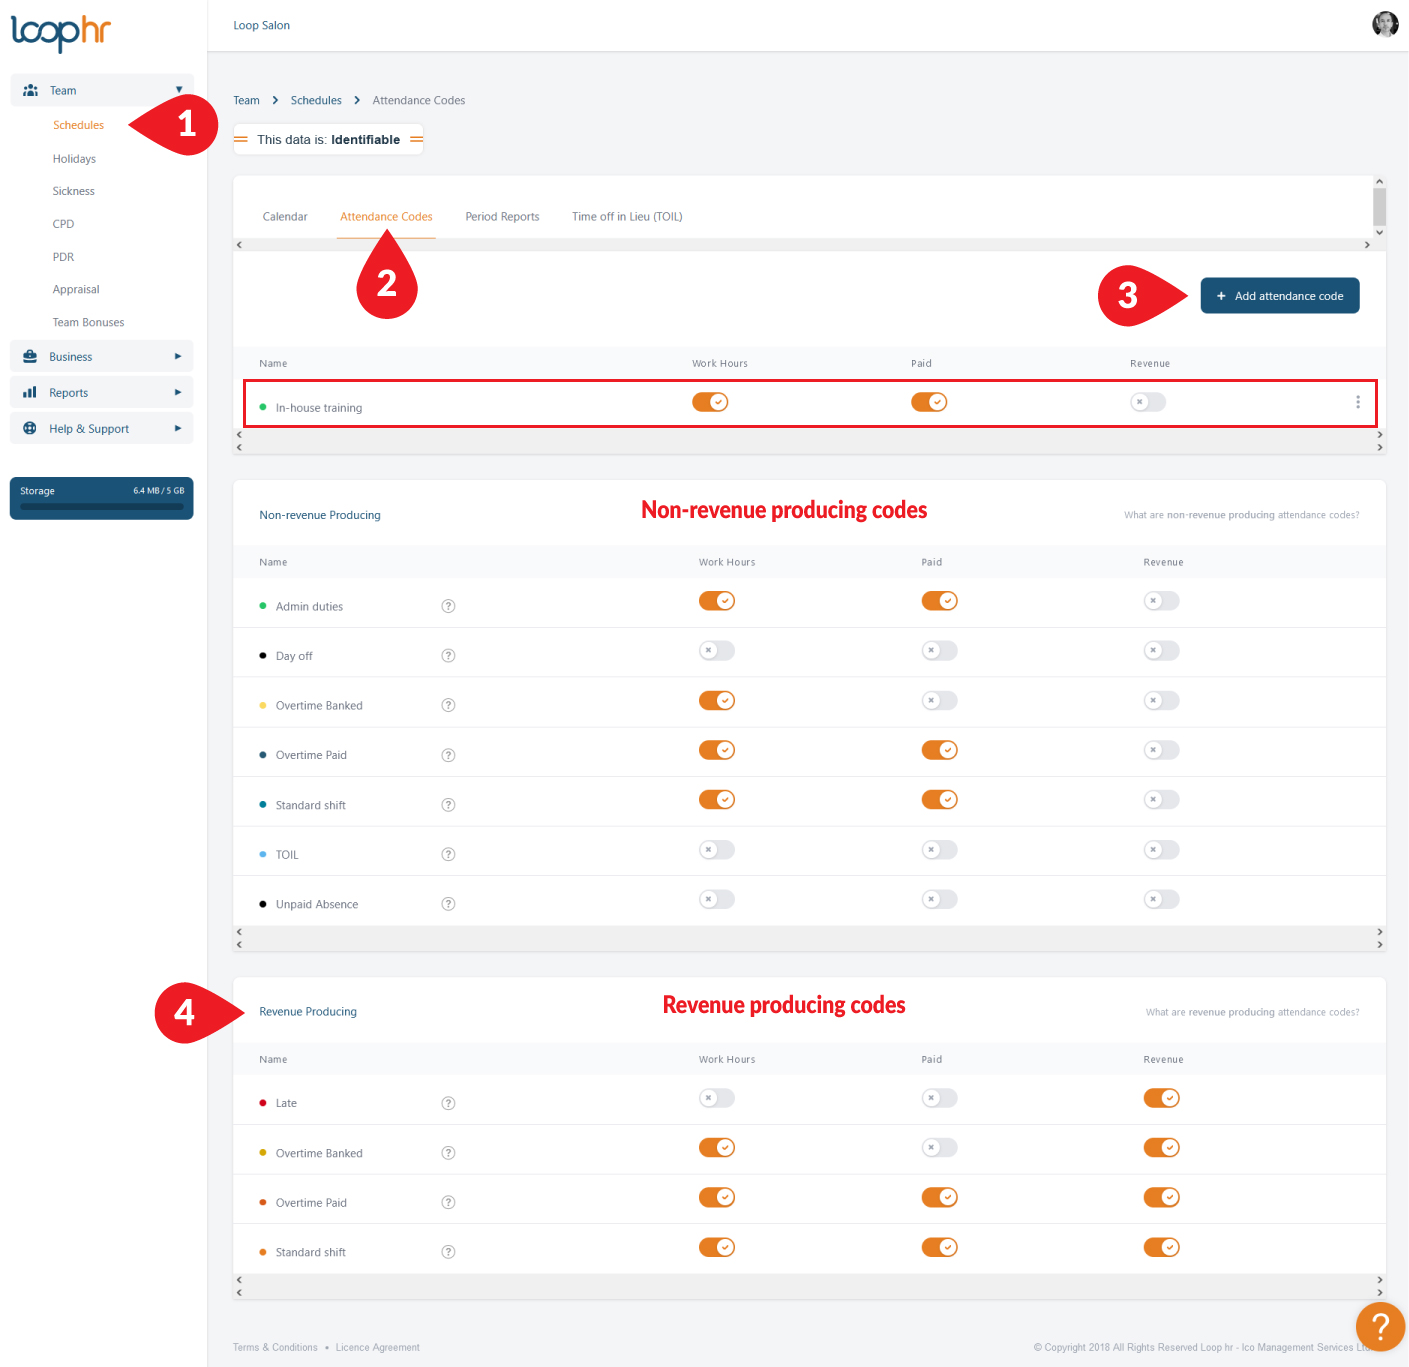
[1] Get started
Go to Schedules.
[2] Attendance Codes
Select Attendance Codes, here you see all the event codes. Note: system attendance codes cannot be changed.
[3] Create bespoke codes
Create your own attendance codes and assign any combination of rules, simply click Add Attendance Code and follow the process.
[4] Flag revenue producing shifts
For revenue producing team members you must use codes from the Revenue Producing list (defined by the initials ‘RP’ when adding an event in schedules) to create dynamic targets.
Please note Scheduling is important!
Loop hr creates dynamic targets (targets that reflect the actual hours scheduled) based on individual employee hours set within a work period. For example, a 4 week 20 day work schedule with 10 days holiday. Remove the schedule when approving the holiday and the target for the period reduces according to the number of hours worked.
Adjusting revenue producing schedules will impact targets (reduce hours the target goes down, increase hours, the target goes up).
Employees on the ‘Zero Hour Contract’ setting will rely entirely on the hours set in the schedules for their targets, pay/commissions and holiday accrual data.
Employees access their work schedule data via their Loop hr Dashboard.
Add a work Schedule (create an event)
[5] Select Schedules from the navigation, it will open in Calendar view
[6] Click ‘Add to Schedule’
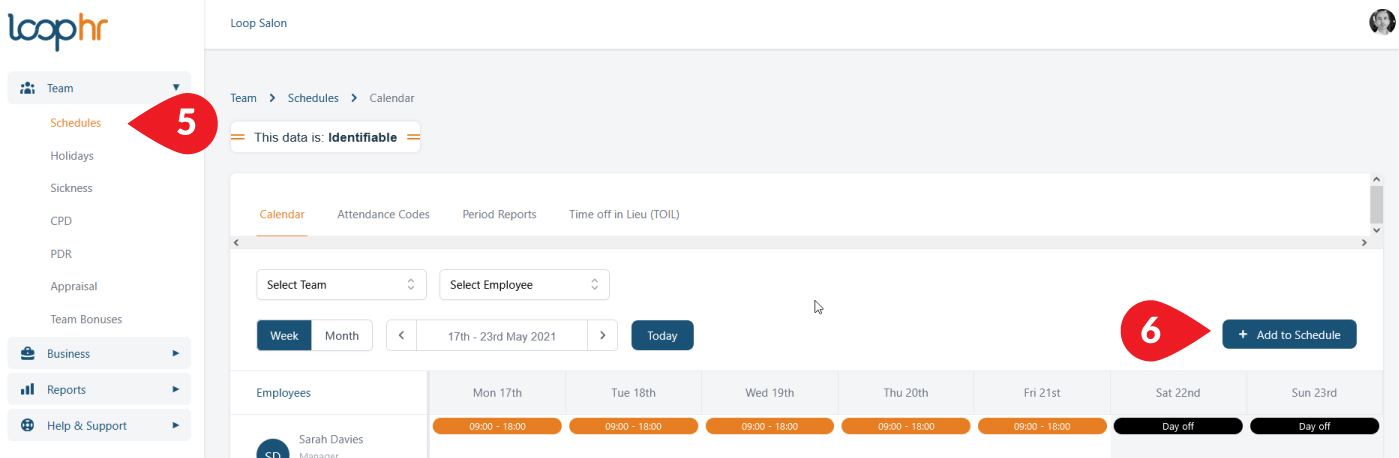
[7] You can add to the schedule in two ways, Click Add to Schedule, or click on the calendar on the date and name of employee.
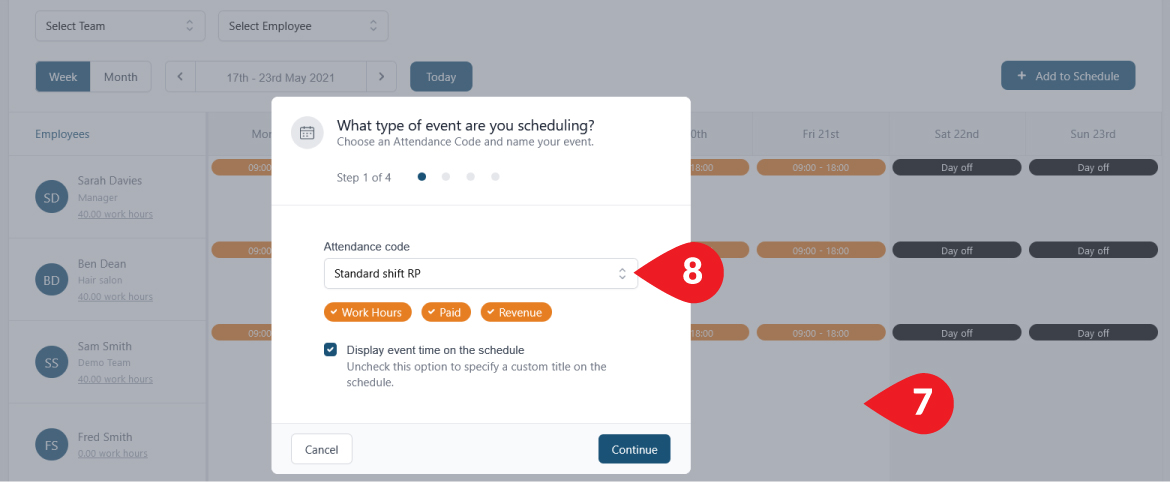
[8] This will open a window, the Attendance code defaults to Standard shift RP (Revenue Producing), to change the attendance code simply click on the title and either search by scrolling through the list, or use the search bar to search by name.
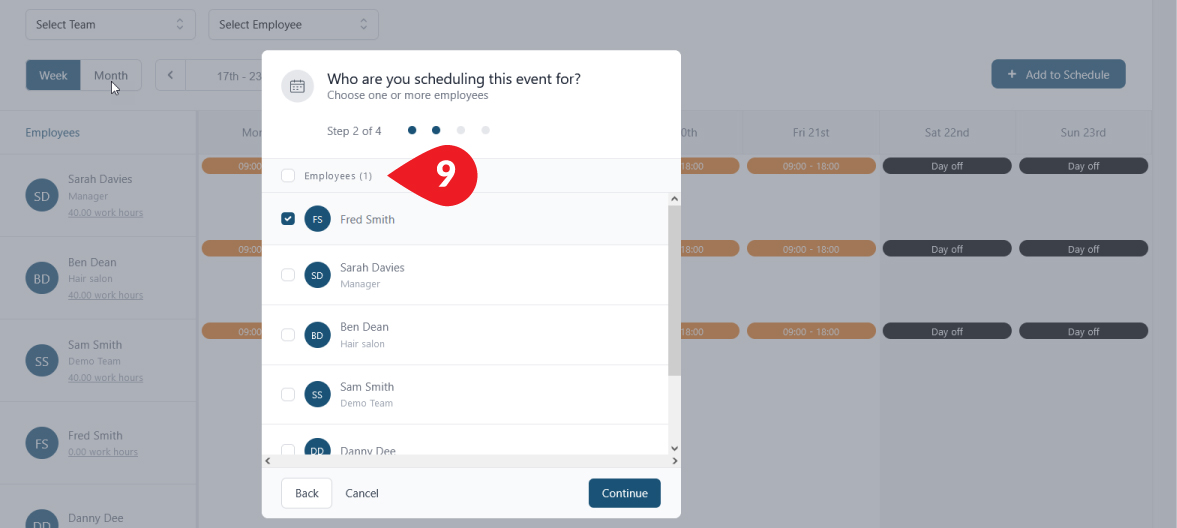
[9] Select an employee or choose multiple employees with the same shift, when done click continue
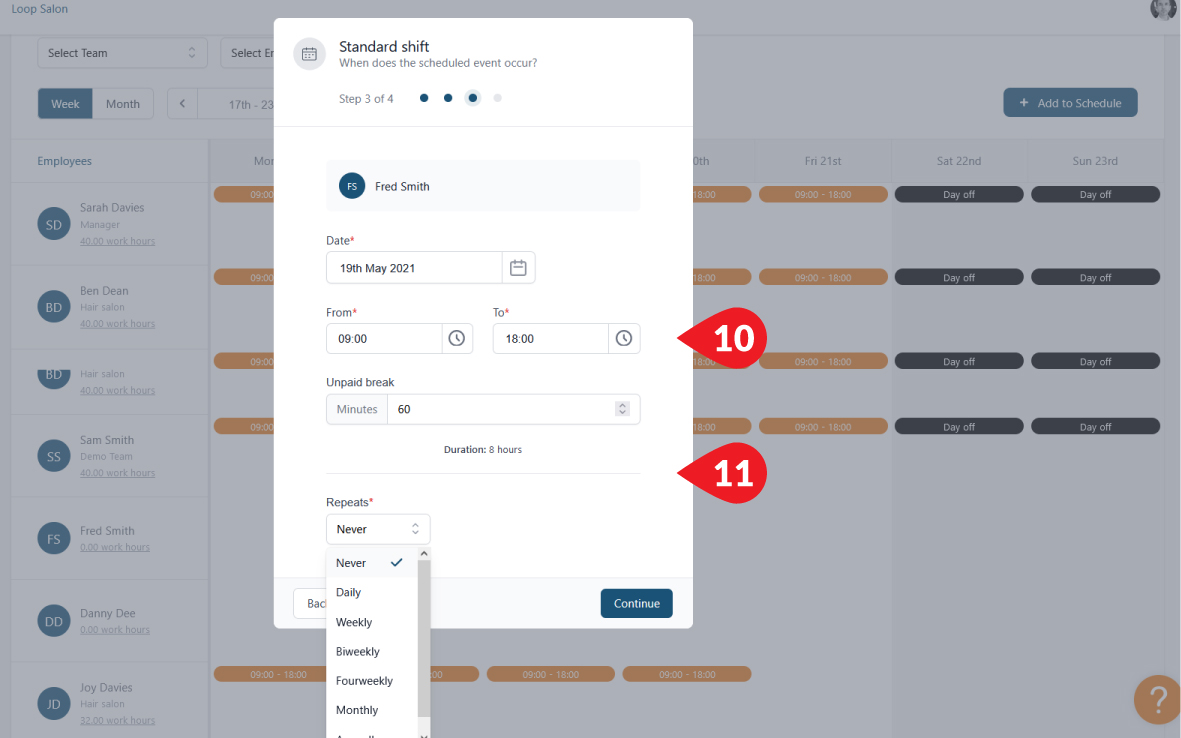
[10] Confirm the event details, date start and finish times, if there is an unpaid break add the number of minutes – this will reduce the revenue producing time and the target proportionately. If the worker is paid by the hour, it will reduce pay accordingly.
[11] The system will show the duration of the work shift and if you wish to repeat the event, select weekly, biweekly, four-weekly, monthly or annually? Once all the information is correct click Continue.
[12] Next you will see a summary of the information you have set; you can add notes (useful for individual team member events where you can specify a lunch break or note a change in the shift). Notes are visible to employees and all managers with scheduling rights.
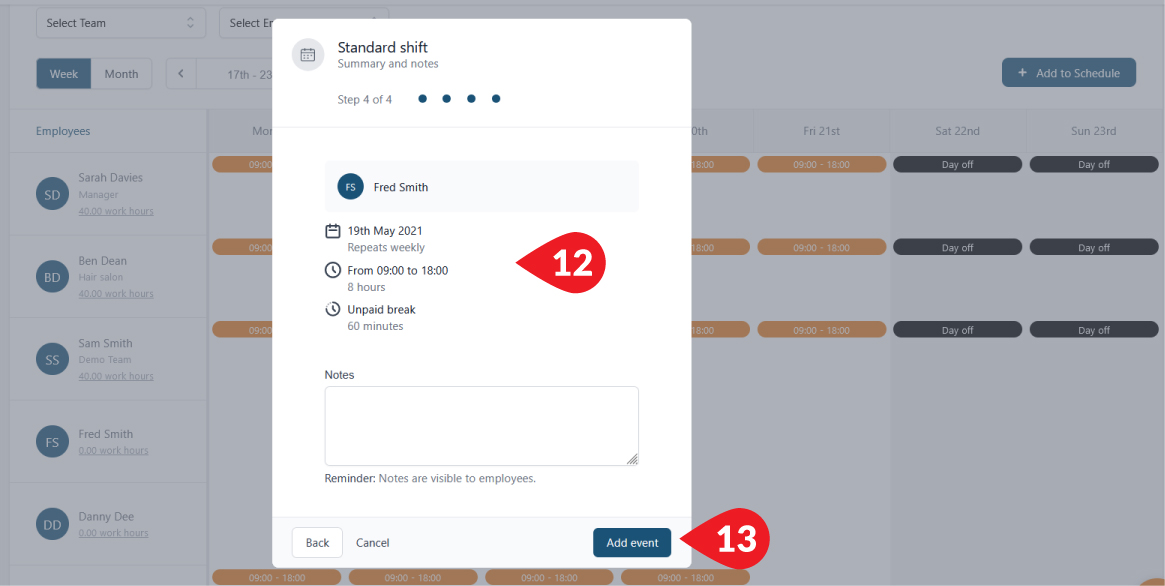
[13] When happy that all is correct click Add event.
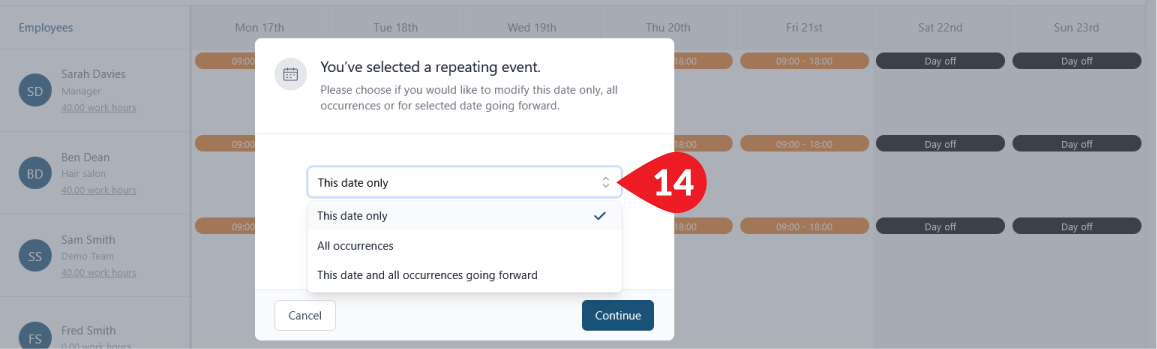
[14] Should you need to edit (or delete) a single event simply click on the event and make the changes. For reoccurring events you can edit or delete in three ways: select ‘This date only’ to change this date only (obviously). Click the drop down to change ‘All occurrences’ (this changes historical events too) or change from ‘This date and all occurrences going forward’. Click Continue and make any amendments, save and close.
Once all schedules have been added its important to manage schedules on a regular basis, a couple of minutes each day to record any attendance changes (for lateness or unexpected absences, overtime and changes in events) will speed up the payroll process and ensure financial targets remain accurate!
[15] Once an employee’s schedule has been set, you can view their hours from the schedule. Beneath the names you see total work hours; or you can view a detailed breakdown by clicking on the work hours link.
View by week or month, however you have the schedule set *
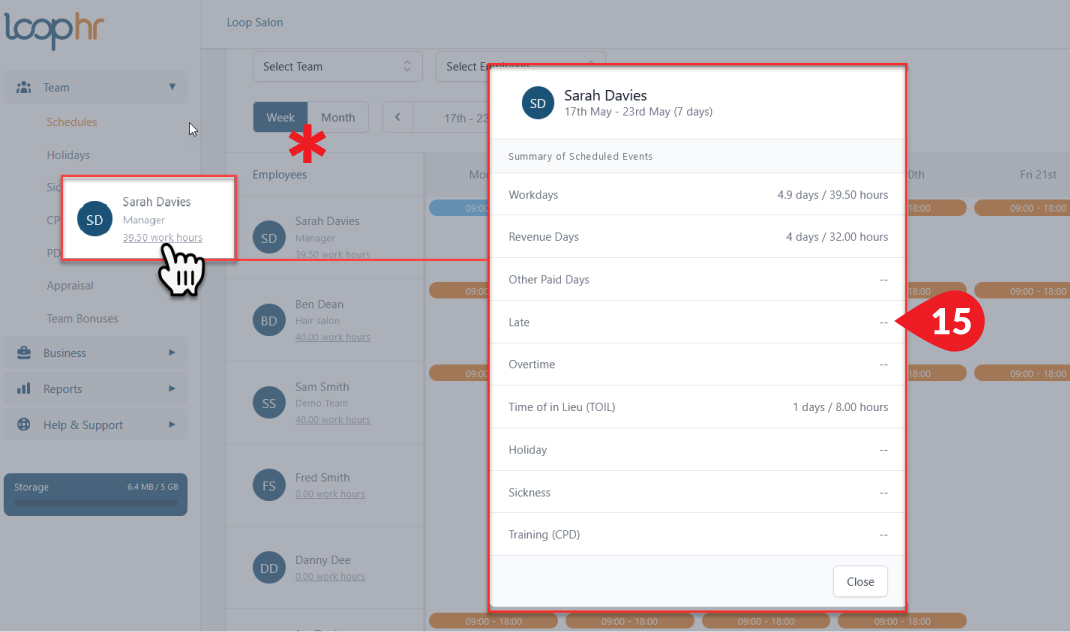
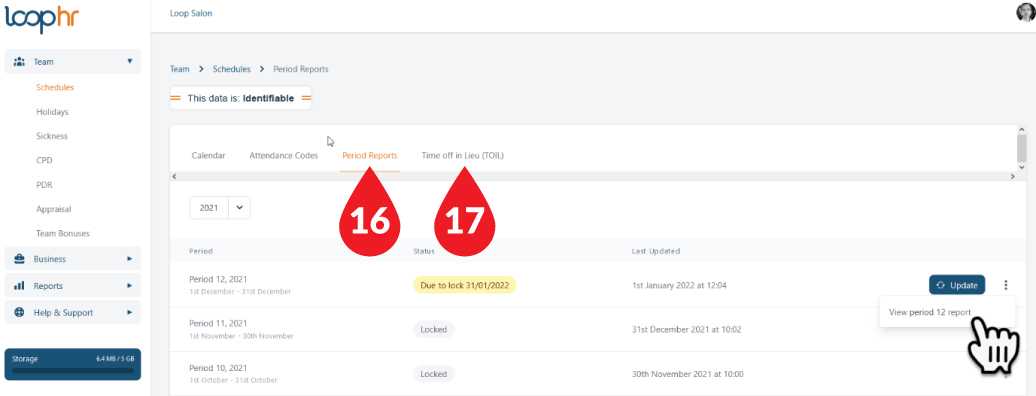
[16] You can also see a breakdown of previous months attendance data in Period Reports, click on Period Reports tab and the hamburger dots at the end of the line and click View period report; here you will see a list of attendance codes and the days/hours associated to each employee and each code used in the period.
[17] See a record of all TOIL activity (hours accrued are referred to as Banked Hours) and hours taken back by the employee with a breakdown of dates and hours.
For reporting accuracy, attendance data will be locked once a period is complete. However, you can amend the previous months data up until the end of the following period (in case you need to make adjustments which may affect targets and/or bonuses/commissions payments paid in arrears).
Double check the schedules are correct before starting to process payroll (if you haven’t been updating them throughout the period)!
The following elements show in the schedules however:
Holidays are managed using the ‘Holidays’ feature and appear in the Schedule once approved by a manager. See how to manage holidays here.
Absences for sickness is managed using the ‘Sickness’ feature; once reported (by the employee or a manager) the event will show in the Schedule. See how to manage sickness here.
Training events, when added via the Continual Professional Development (CPD) feature, will show within Loop HR Schedules. See how to manage CPD’s here.
If you would like assistance in setting up a template work schedule for your business, please contact us via live chat under Help & Support in the navigation panel.
Back to knowledge base index