Document Manager (Docs & Files)
Back to knowledge base indexThe purpose of Loop hr Document Manager is to help you organise, easily manage and share company documents (handbooks policies & procedures), employee GDPR compliant documents (contracts, P60’s, starter checklist, and Pension information) and more.
Our Document Management primary functions are:
- Store documents securely in line with GDPR compliance
- Organise documents so that you can easily find and manage them
- Allow you to share documents with team members / or store documents without sharing
- Ask employees to acknowledge and/or sign documents
- And if there was a fifth, it would to help you go paperless, saving paper, storage and the planet (in some small way).
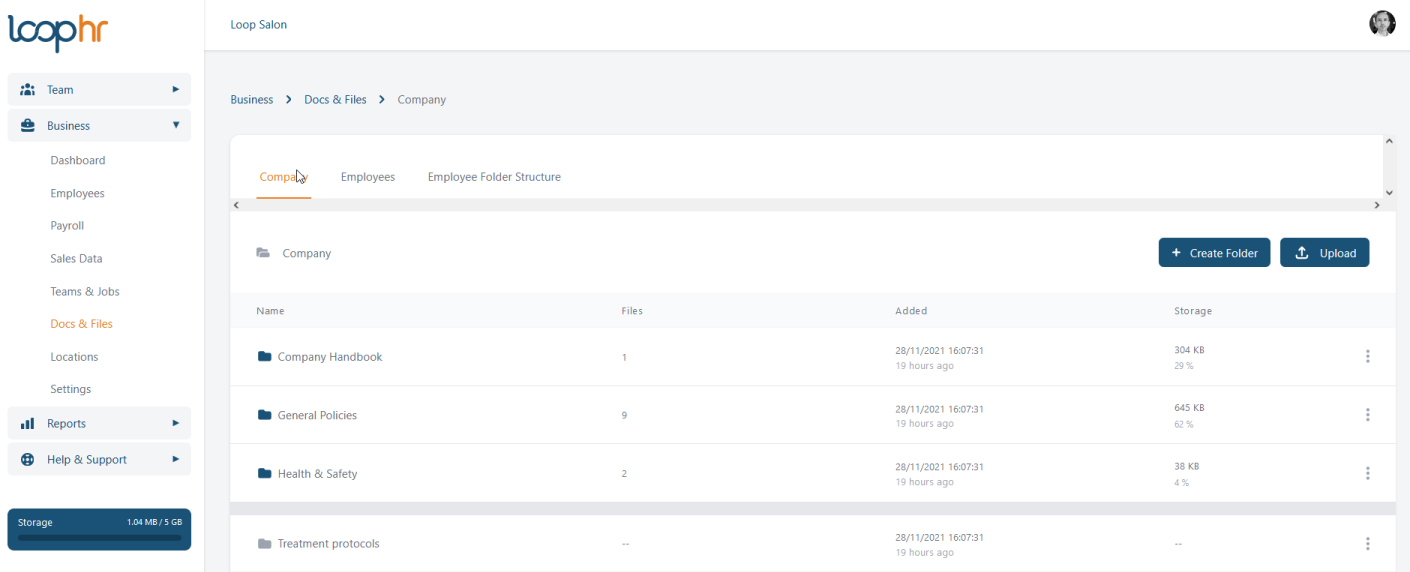
Below is what your Company Folder structure would look like if a) you don’t have any documents currently uploaded; or b) you have moved all your docs & files into folders (as in this example).
We provide three fixed folders, Company Handbook, General Policies and Health & Safety, we also added a Treatment Protocols folder which you can use as is, or edit its title to something more suited to your business. You can add as many Folders as you wish.
How to manage your Docs & Files within Loop hr
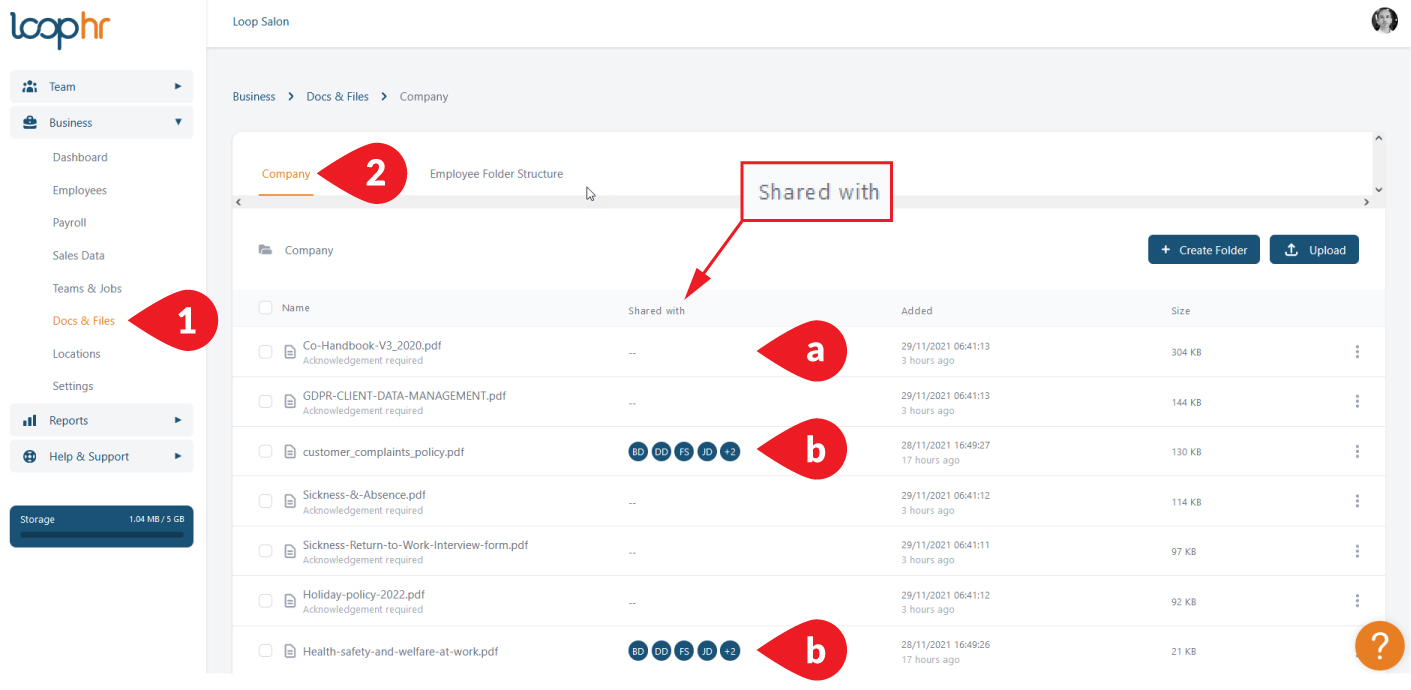
[1] Go to Business > Docs & Files and you see [2] the Company Folder; here you store all company files (as in non-employee specific files).
If you have documents loaded in the system already, they will show as the example below, directly above the Company Folders.
In this example you can see if a document has been shared with an employee.
- [a] The document has not been shared with team members (the column is blank).
- [b] The two documents with Avatars have been shared with Team Members.
Documents can be moved into the Company Handbook folder before or after sharing with team members (we’ll show you how to move documents below).
Organising (Moving) Documents / Files
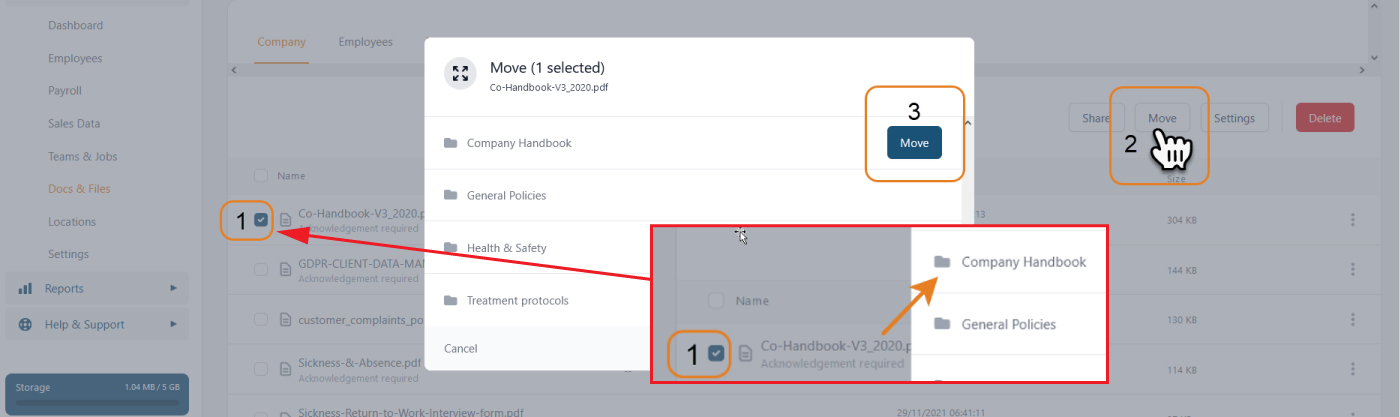
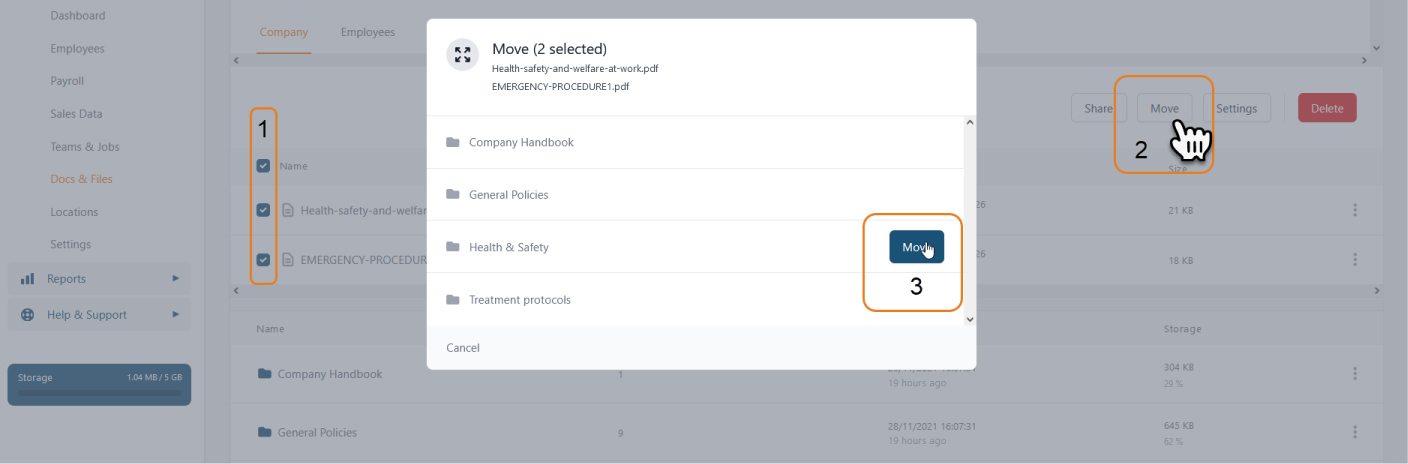
To move a document (also known as a file), 1) select and then 2) click Move and finally as in point 3 click ‘Move’ into the relevant folder. In this example you see we are moving the Company Handbook into its own folder so that it easy to find; and for your employee they will see the Company Handbook folder under their Company Documents.
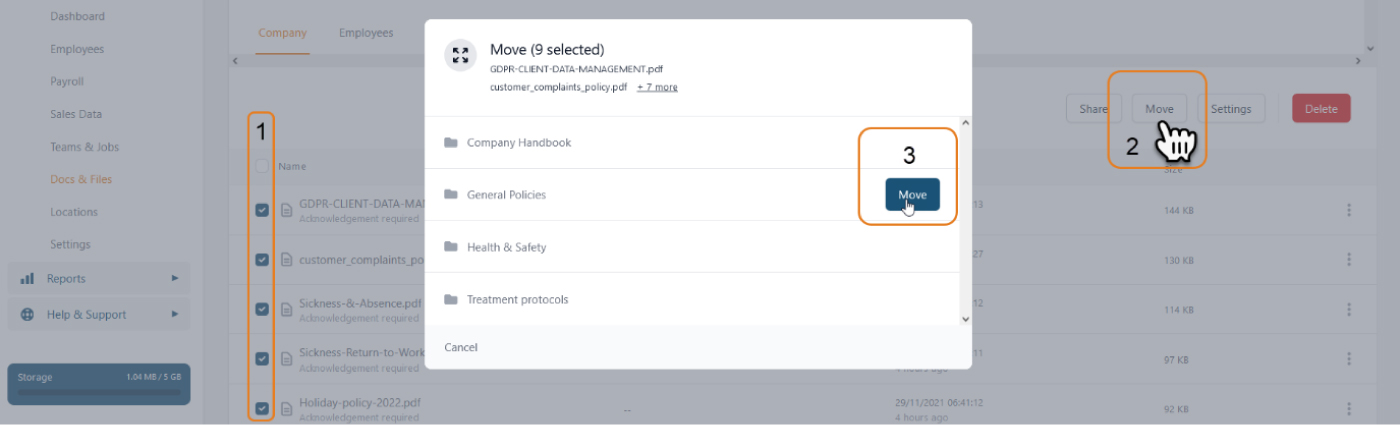
To move multiple Documents, do the same as above except select multiple documents and move them all at once into the relevant folder (in the example below, we move multiple documents to General Policies):
In the example below, we are moving the last two documents into the Health & Safety folder. And finally, once moved, you end up with all the documents in the correct folders:
Now all your files are in the right Folders you can:
- share the them with team members (if they are not already shared)
- decide which (if any) need to be acknowledged by the team member (as in acknowledge that they have seen/read a specific document)
- or if they are required to sign a document.
You can set the system to acknowledge if an employee has opened a document, it cannot determine if a document was actually read! It will however date stamp when the document was opened.
Signing documents in Loop hr, asks the employee for a digital signature, the signature does not sit on the document, it sits on the file. Digital Signatures are legally binding and valid in most countries including the UK Europe USA Canada Australia & New Zealand.
Acknowledge & Sign a document / file
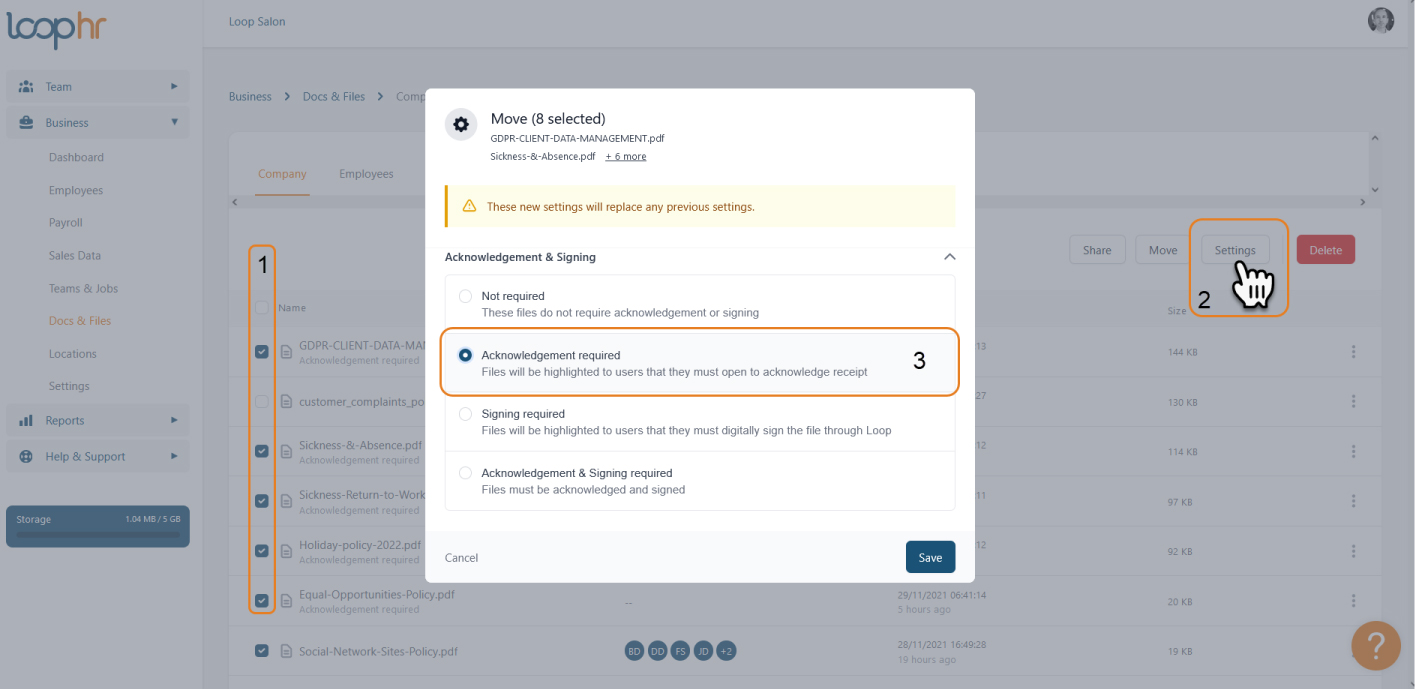
To set a document or multiple documents to be acknowledged or signed, click on the Folder (with documents that require Acknowledgment and/or signing).
Then first select the document (or multiple documents that require the same action), second go to Settings, thirdly select the Action you require from the recipient – when complete, click save.
Now as you have assigned some or all documents to be acknowledged (or signed) you can share the documents to one or more team members.
If you have already shared the document but now marking it for Acknowledgement the employee will see a notice on their Docs & Files to acknowledge a document.
If you requested a signature, the employee will receive an email, informing them that you require a signature and for which document.
Share documents with Employees
To Share documents, first select the files to share, second, select Share; Thirdly, select employees to share with, click Share View how to video here
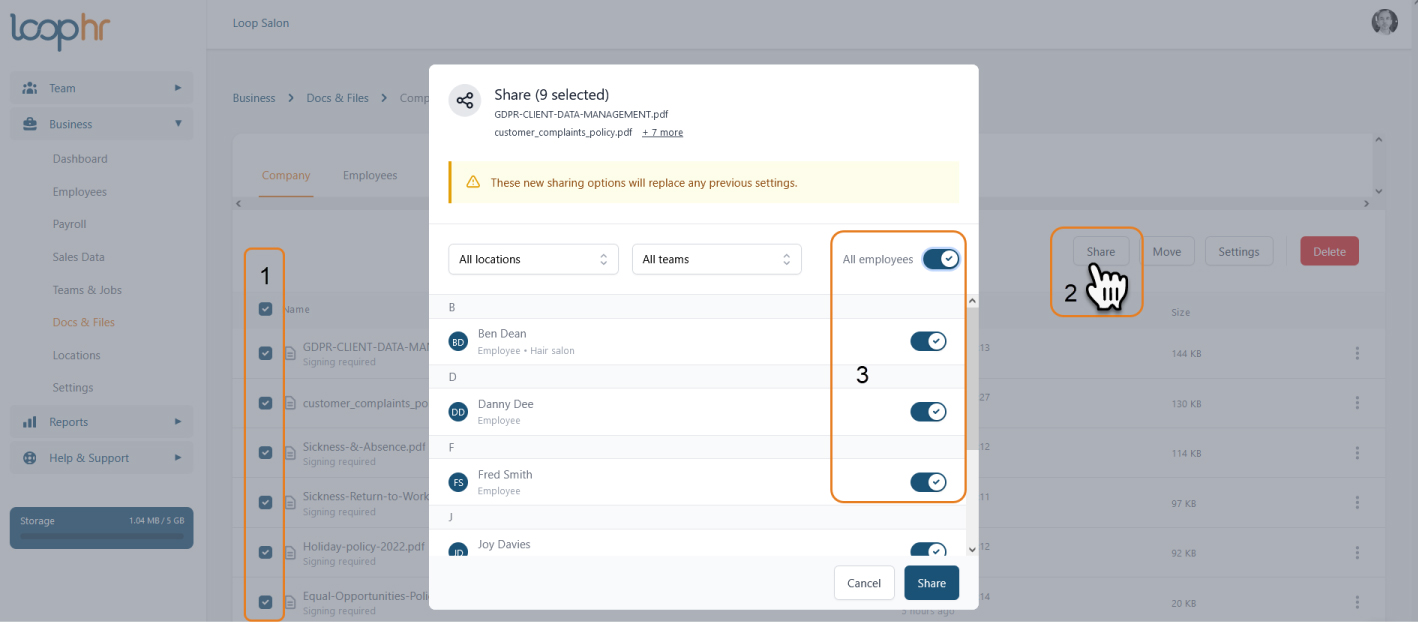
If at this stage, you have marked a file/document to be acknowledged or signed, once the document is assigned to an employee, the relevant team member will automatically receive a notification that they should complete an action (acknowledge or sign) the document.
You can create as many Company Folders as you wish, you can store files up to 5GB with the Pro package and 2GB with the Advantage package.
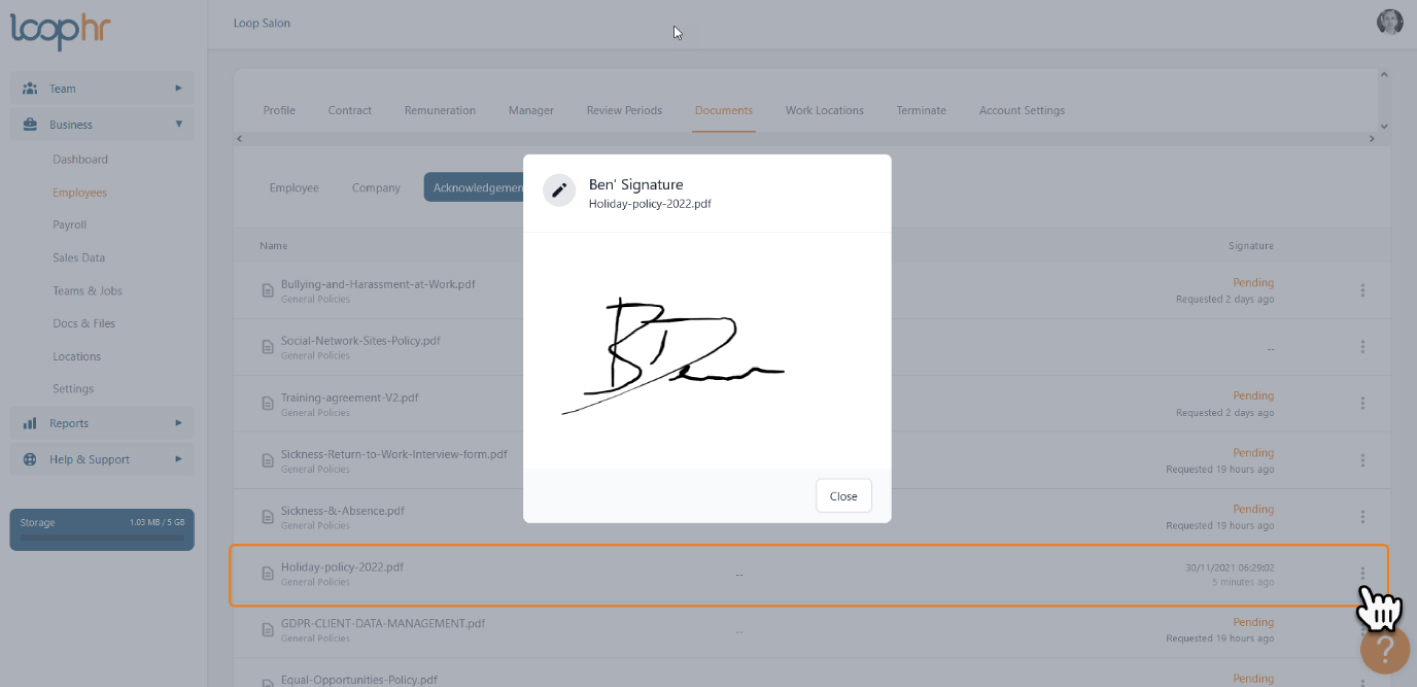
View a signed or acknowledged document
Once an employee has signed a Document, you can view it under the Employees Tab, in this example we are in Employees > Employee Name > Documents > and we see a list of documents to be actioned by the employee – the Holiday Policy has been signed:
Storage
You will see a Blue Storage counter in the navigation panel, it shows what is used of your allowance. With the Pro package you have 5GB of storage and the Advantage Package gives you 2GB of storage.
If you run out of storage please contact support, they will arrange to upgrade your plan further.
If you have questions, please contact us via the Chat feature in the Help & Support tab.
Back to knowledge base index